Laboratory Distillation Guide: Methods, Setup and Safety
Distillation helps us separate or purify liquids by using differences in boiling point and volatility. It is a foundational technique across chemistry laboratories, research facilities, education settings and quality control work. When the setup is right, you can collect a cleaner liquid fraction while observing the process clearly and safely.
At LabChoice Australia, we know that dependable results begin before heat is applied. Method selection, compatible glassware, steady heating and careful temperature control all affect how well a separation works.
Make Separation More Reliable with Distillation
During distillation, a liquid mixture is heated until the more volatile component turns into vapour. That vapour moves into a condenser, where it cools and returns to liquid form before being collected in a separate vessel. The less volatile material generally remains behind in the boiling flask.
We recommend treating distillation as a controlled process rather than a fast one. Stable heat and accurate temperature readings help you recognise which component is coming over and when to change collection vessels.
Common laboratory uses include:
- Recovering and purifying solvents
- Producing distilled water
- Preparing chemical samples for further work
- Separating reaction products
- Demonstrating evaporation and condensation in teaching laboratories
Distillation is not the answer to every liquid mixture. Compounds with very similar boiling points may need fractional distillation, while azeotropes and heat-sensitive materials often require specialised approaches. Durable borosilicate glassware is well suited to routine heating and cooling cycles, helping you maintain visibility and support repeatable work.
Choose the Right Distillation Method
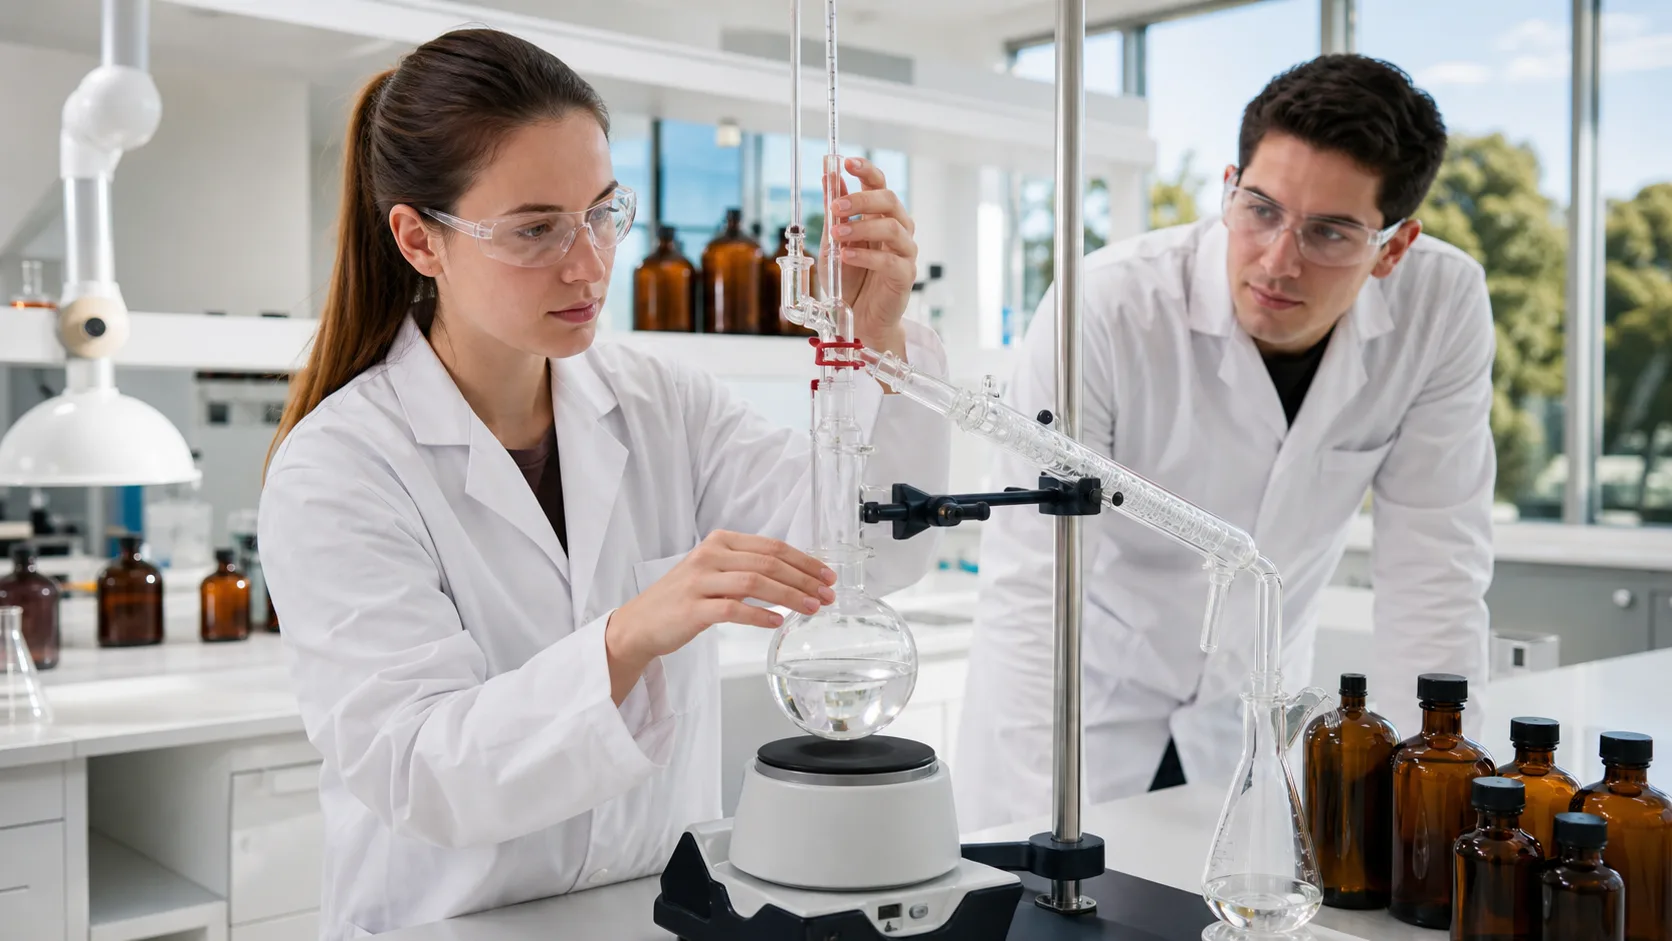
Simple distillation is often the starting point when boiling points are clearly different, when a volatile liquid needs separating from non-volatile material, or when a solvent needs purification. A typical distillation apparatus for laboratories includes a boiling flask, thermometer adapter, condenser, receiver adapter and collection flask.
For liquids with closer boiling points, fractional distillation usually provides better separation. A fractionating column creates repeated cycles of vaporisation and condensation before vapour reaches the condenser. Column packing, reflux and gradual heating can all influence the purity of the collected fractions.
Some samples need a lower-temperature approach. Vacuum distillation reduces boiling points by lowering pressure, which can suit high-boiling or heat-sensitive compounds. Steam distillation can be used to isolate volatile oils or water-insoluble compounds at lower effective temperatures.
Before selecting a method, we recommend checking:
- The sample’s expected boiling range and chemical behaviour
- Whether any materials may break down with heat
- Glassware, joint and tubing compatibility
- Vacuum requirements, traps and approved operating procedures
- Waste handling requirements for the materials involved
Assemble a Stable Distillation Setup
A stable arrangement supports smooth vapour flow, reduces product loss and helps prevent avoidable hazards. Start by checking that every component is clean, free from chips or cracks, and fitted with compatible joint sizes.
Your setup may include a boiling flask, heating source, thermometer, condenser, rubber tubing, receiver adapter and collection vessel. Each piece should be supported correctly so that glass joints are not carrying unnecessary weight. Borosilicate glassware is particularly useful for experiments that involve regular heating and cooling.
Positioning matters. The boiling flask should be held securely with suitable clamps, while the condenser should slope gently downward towards the receiver. This encourages condensed liquid to flow naturally into the collection vessel.
Place the thermometer so its bulb sits near the entrance to the side arm. That position measures vapour temperature rather than the temperature of the liquid in the flask, giving you more useful information during collection.
Condenser water should enter through the lower connection and leave through the upper connection. This keeps the condenser jacket full for more even cooling. When assembling a distillation apparatus for laboratories, make sure tubing is firmly attached, water flow is steady and the receiver is supported to avoid strain on the glassware.
Control Heating and Collection Carefully
Slow, even heating usually produces a cleaner separation than aggressive heating. Depending on the sample and your approved laboratory procedure, you may use a heating mantle, hot plate, oil bath or water bath. The aim is to maintain controlled boiling, not to force the process along.
Heating too quickly can cause bumping, push liquid into the condenser, flood the system or blur the separation between fractions. It can also lead to lost material and a less useful final sample.
Boiling chips, anti-bumping granules or magnetic stirring can help create smoother boiling when suitable for the procedure. Never add boiling chips to a liquid that is already hot, as this can cause sudden, dangerous boiling.
Throughout the run, record the vapour temperature and watch for periods where it remains steady. A stable temperature can suggest that one component is distilling. Collect the distillate in labelled containers, changing receivers when the temperature range shifts or your collection target is reached.
Pay attention to changes such as:
- A sudden rise or drop in vapour temperature
- Slower or faster distillate flow
- Changes in colour or clarity
- Weak condensation in the condenser
- Signs that heating or cooling water needs adjustment
Protect People and Equipment During Distillation
Every distillation should begin with a risk assessment. Confirm chemical hazards, flammability, vapour exposure risks, pressure concerns and waste requirements before the system is assembled. We recommend wearing safety glasses, a lab coat and gloves chosen for the chemicals being handled.
A heated distillation system must never be completely sealed. Pressure can build rapidly if vapour has no open path. Check that joints are secure without being forced or over-tightened, and confirm that the vapour route remains clear before heating begins.
Vacuum distillation requires added care. Inspect glassware for damage, use compatible tubing and make sure suitable traps are included in the approved setup. Glass under vacuum can present different risks from a standard atmospheric-pressure arrangement.
October’s warmer Australian spring conditions can also affect heat management. Confirm that laboratory ventilation is adequate for vapour-producing work and that condenser water stays cool enough to support reliable condensation. Once the run is complete, allow equipment to cool before dismantling it, and use heat-resistant tools where required.
Prepare Your Distillation Bench for Better Results
A repeatable pre-distillation checklist can make each run calmer and more consistent. Before starting, confirm the method, inspect the glassware, secure clamps and joints, test cooling water flow, prepare labelled receivers and review chemical safety requirements.
Careful preparation supports clearer observations, steadier fraction collection and better protection for staff, samples and equipment. With compatible glassware, controlled heating and an open, properly supported system, you can approach each distillation with greater confidence and consistency.
Equip Your Distillation Work With Confidence
LabChoice Australia offers reliable distillation apparatus for laboratories to support accurate, repeatable separation processes. Our range helps you select compatible components for teaching, research and routine laboratory work. For assistance choosing suitable equipment, contact us and our team will be happy to help.